Creative SPOT UV Varnish
12.10.2012
Hi there.
How’s things?
OK, so SPOT UV varnishing has been around for many years, but love it or hate it, it remains one of the most popular creative print finishes ever.
There are now a few choices of Spot UV Varnish: the obvious matt and gloss options are widely used of course but you can have textured and glitter varnishes. For a visual AND tactile effect, High Build Spot UV varnish can be applied.
Spot UV Varnish is generally a screen printed process where certain areas of a design are ‘picked out’ and the varnish is applied only to these areas – hence ‘spot UV’. A gloss varnish is often applied over pictures or graphics to enhance them, this is especially effective where the background is very matt. A highly popular finish is to Matt Laminate AND Spot Gloss UV as this gives the best contrast. You can also do the reverse too but in my experience, spot MATT UV isn’t nearly as effective.
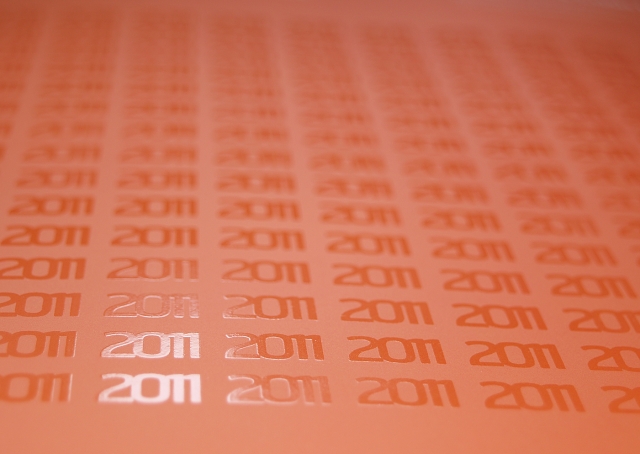
You can also create some beautiful effects using Spot UV ‘blind&rsquo$$ in other words, a pattern, text or graphic is ‘picked out’ with the Varnish but doesn’t register with a printed element underneath. Of course, you can do both too.
Things to avoid when using SPOT UV
I am frequently asked about Spot UV’ing over uncoated stocks. Perhaps a slightly controversial comment as I have seen it done before but ideally, Spot UV varnish on uncoated stocks should be avoided. As uncoated stocks are very absorbent in comparison to coated stocks, the very runny varnish is instantly absorbed into the material. The ‘first pass’ will have very little effect if any, so, it will need a second and even third pass through the machine to have the same applied again, in the same position. The first pass almost acts as a base coat for the second/third coats. It can work but obviously this could be cost and time prohibitive and also you will often see movement and mis-register with the subsequent coats. The UV Company will almost certainly want to run a test or two!
Clear foil on 590gsm UNCOATED
If you want the same type of effect when using uncoated stocks, try a clear gloss foil. This will look just as stunning.
It’s advisable not to spot UV really fine detail or fine type, especially if this has to register with printed elements. The varnish does spread a tiny amount and while it won’t notice too much on large, chunky or bold areas, on the finer details it probably will. This isn’t such a problem if the spot UV is ‘blind’.
Registering Spot UV onto text/imagery over large areas can also be tricky. For the same reasons as above but also because you will get movement ‘on the run’ and as the paper/card substrate can stretch making a perfect register impossible.
As UV Varnish is very brittle once cured/dried, avoid placing the UV’d elements over folds or creases. It WILL crack and look quite nasty, especially over heavy ink coverage .
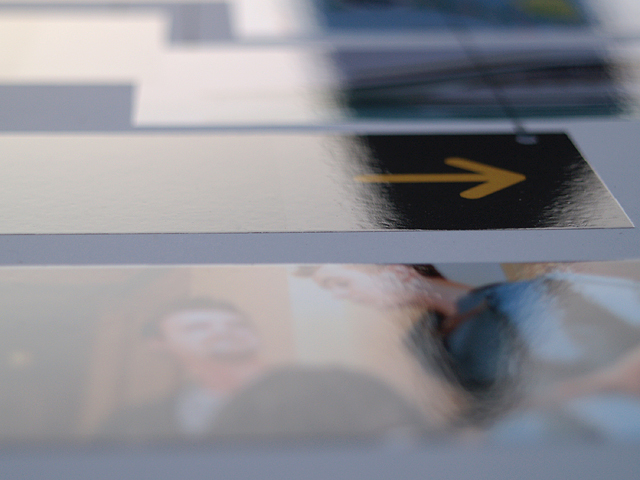
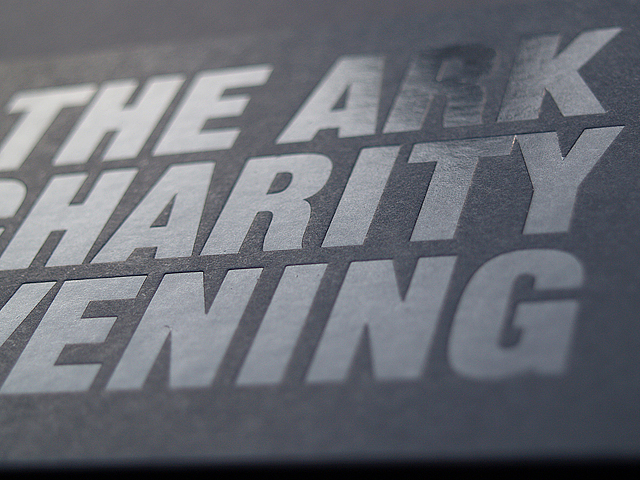
However, if you laminate first, you will very often avoid this issue. BOTH covers pictured above have been laminated with Spot UV over and both have the varnish going over the cover ‘hinge’ . . . no cracking!
Finally, dont use or try and spot UV tints. (Tinted or half-tone spot UV is possible but the screen will need to be VERY coarse (60lpi approx) and this can look a bit rough . . . of course, if you want rough, that’s fine!).
How to set up SPOT UV Artwork
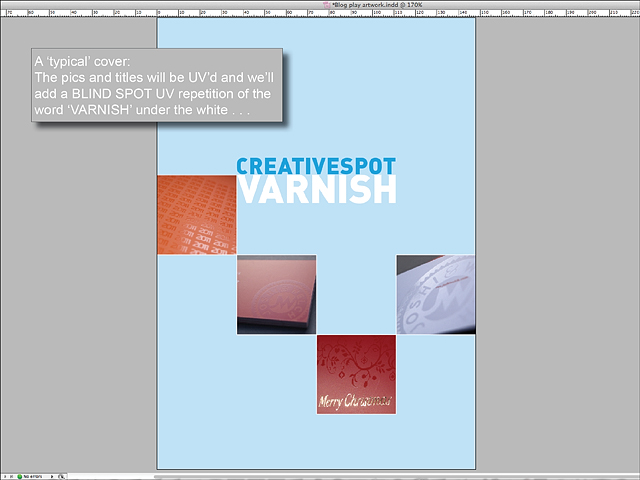
So let's say you have an A5 job and you want to Spot UV the title and the pictures on the outer front cover . . . let's say you are using InDesign (the concept of this will be identical in Quark etc) . . .
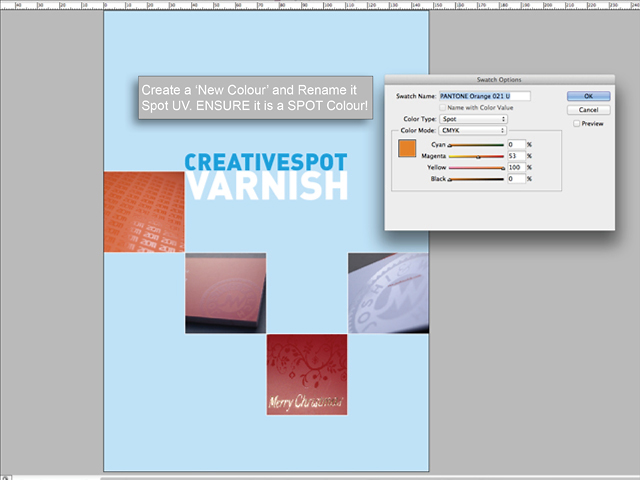
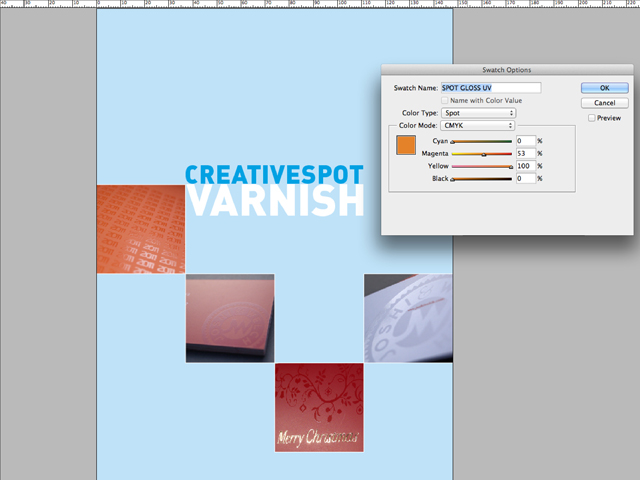
Create a new colour, make sure it is a SPOT colour and re-name it SPOT UV VARNISH (or something like that). This allows it to be clearly indicated as the varnish.
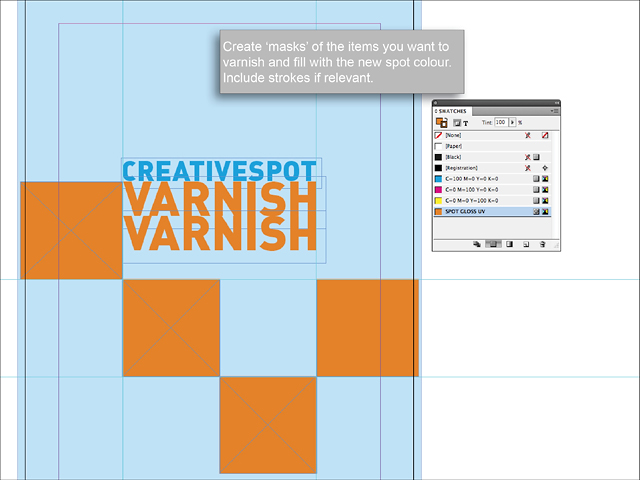
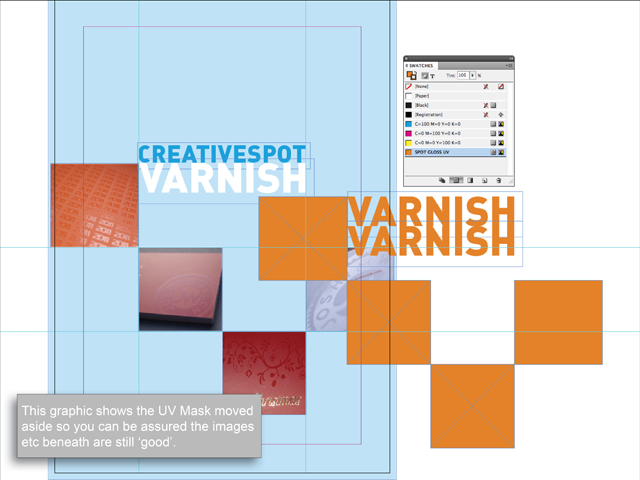
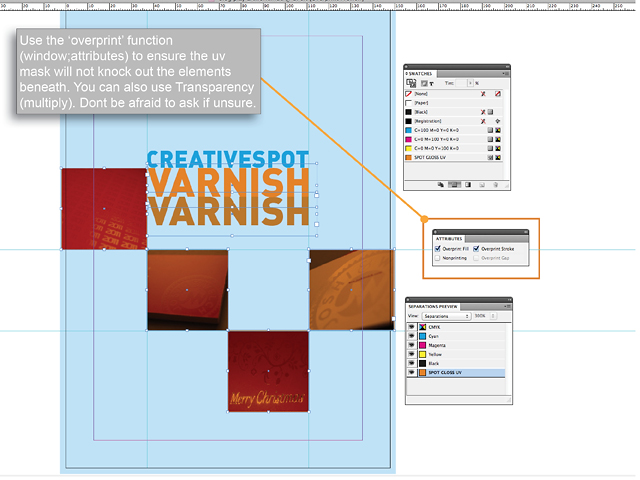
Now, create a mask for all the elements you want to UV and position the mask in exactly the right position over the main artwork. Copying the items and ‘pasting in place’ makes this easy. Then fill the mask with your new spot colour.
It is important that you set the mask to ‘overprint’ but if you are not sure about this, I would hope that your printer would help you with this (we would of course!).
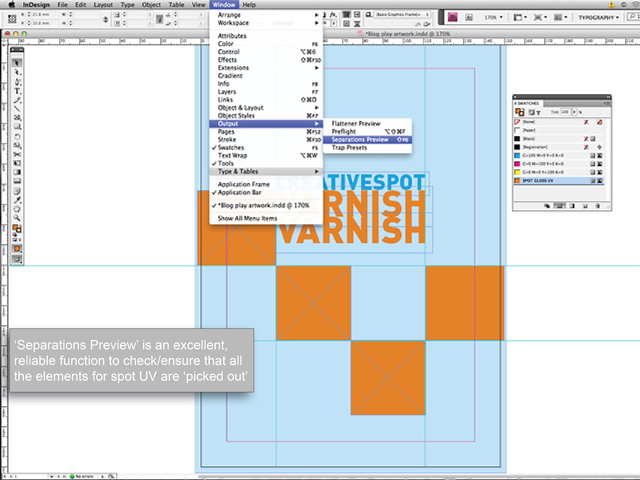
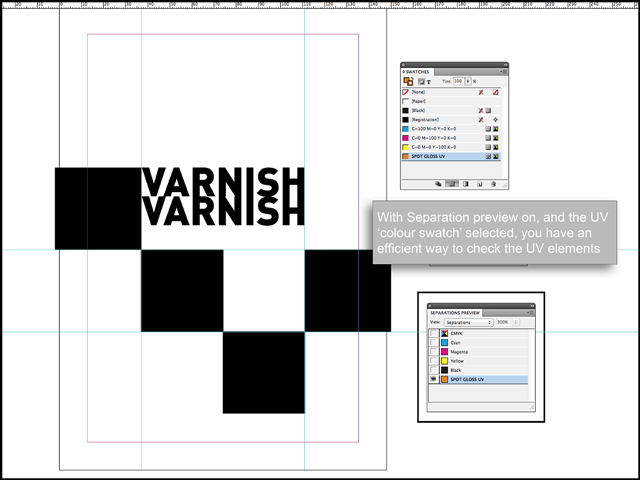
Finally, use the ‘Separations Preview’ type function to double check that you have correctly picked out all the elements to be UV’d.
Then send the files off.
One final note is that it is a good idea for you to check and approve some kind of proof for the UV. When processing artwork files, it is unlikely but things can move – it’s good practice to check this.
Hope this helps.
By all means, if you have ANY questions or comments on this topic, please do let me know. ANY and ALL feed back is good.
Likewise, if you would like samples or further advice, please get in touch and I will be pleased to help.
Thanks for reading.
Keith